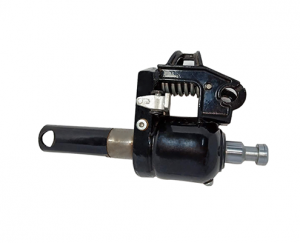
Ductile Cast Iron EN-GJS-600-3

EN-GJS-600-3 ductile iron is a high grade material in European standard DIN EN 1563.

It is equal to GGG60 in DIN 1693, QT600-3 in China, A536 80-60-03 in USA ASTM, GS600-12 in Italy, FCD600 in Japan, FGS600-2 in France, FNG60-2 in Belgium, SJK-600 in Norway and ISO 1083 600-3.

Today, I will introduce the mechanical properties, chemical composition, foundries and castings of EN-GJS-600-3 for you.

Properties of EN-GJS-600-3 cast iron

Tensile strength ≥ 600 Mpa.
Yield strength ≥ 370 Mpa.
Elongation ≥ 3%.
No impact requirement.

Ductile cast iron EN-GJS-600-3 has high tensile strength, middle ductility and plasticity. It also has good wear resistance and shock absorption properties. That means its comprehensive material properties are very high.

It has good casting process performance. At the same time, it could be heat treated to improve the microstructure and mechanical properties.

Hardness of EN-GJS-600-3 cast iron

The hardness of this ductile cast iron grade is between 180-270 Brinell hardness.

Density of EN-GJS-600-3 cast iron

The density of this ductile iron grade is about 7.3 g/cubic centimeter, or 7.3 kg/liter.

Chemistry composition of EN-GJS-600-3 cast iron

According to the standard DIN EN 1563, the foundries could adjust the chemical composition as long as the mechanical and physical properties of the castings could meet the requirements in Standards.

The following chart is an approximate chemical composition range for your reference.

DIN EN 1563 ISO C % Si % Mn % P % S %
EN-GJS-600-3 600-3 2.5-3.6 1.8-2.8 0.3-0.7 ≤0.08 ≤0.02

Foundry of EN-GJS-600-3 cast iron

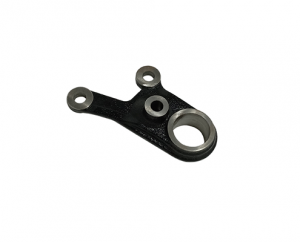
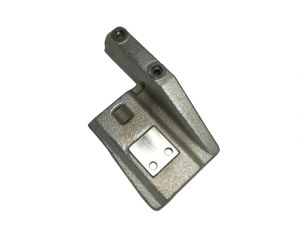
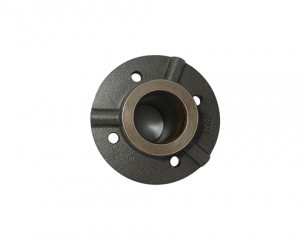
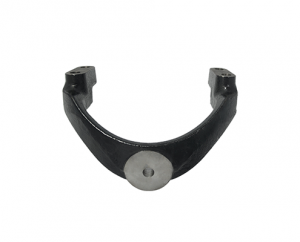
Yide casting is an experienced casting foundry, specialized in casting iron for 28years, can manufacture the casting iron parts according to your drawing file and requirement. If you are looking for a casting manufacturer, please feel free to contact us for more details, and you are welcome to visit our factory for more details.

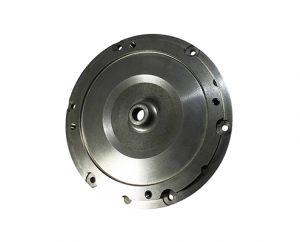
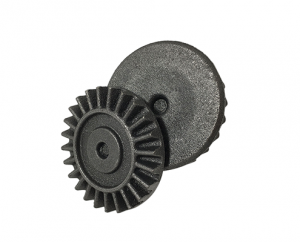
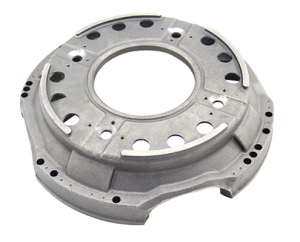
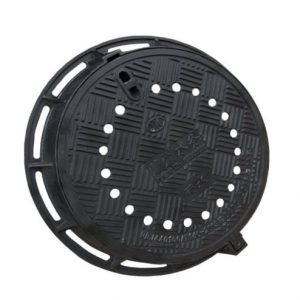
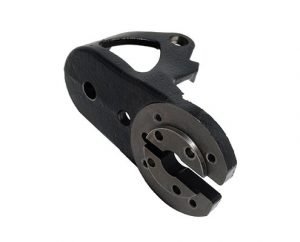
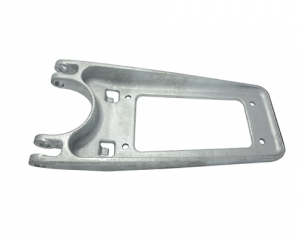
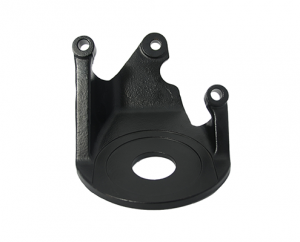
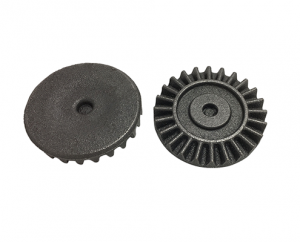
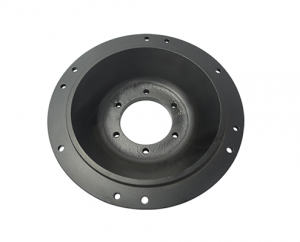
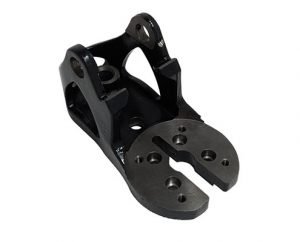
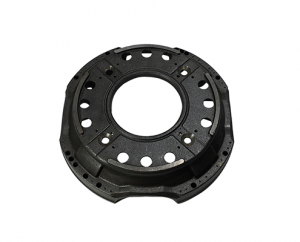
cast iron flywheel cast iron part Auto pressure shell


ASTM A536 80-55-06 Ductile Iron

ASTM A536 80-55-06 Ductile Iron

ASTM A536 80-55-06 is a special grade of ductile cast iron. It is a relatively good material for having comparatively high tensile strength and elongation.

Today, we will share the mechanical properties and chemical composition with you.

1. Mechanical Properties of Ductile Iron ASTM A536 80-55-06 

Tensile Strength ≥ 550 MPa (80,000 psi). Yield Strength ≥ 380 MPa (55,000 psi).  Elongation ≥ 6%.

The hardness range of this grade is 180 – 250 HB. (Brinell Hardness) without heat treatment. However, there is no strict stipulation for this grade.

2. Chemical Composition of Ductile Iron ASTM A536 80-55-06 

The foundries could adjust the chemical composition according to their production experience.  But make sure to meet the requirements of mechanical properties in the Standards.

The following chart is an approximate chemical composition range, which can not be used to production guide.

ASTM A536 C % Si % Mn % P % S % Mg %
80-60-03 3.00-3.60 2.30-2.90 0.30-0.600 ≤0.06 ≤0.04 0.030-0.055

3. Equivalent Grades of Ductile Iron ASTM A536 80-55-06

On account 0f most ductile iron grades require the tensile strength 500 MPa or  600 MPa, there is no equivalent grade to ASTM A536 80-55-06. In consequence, this material grade becomes special. Nevertheless, this grade is similar to 70-50-05 and 80-60-03. You just need to adjust the chemical composition to increase tensile strength and elongation.

4. Applications of Ductile Iron ASTM A536 80-55-06 

This material grade has been used for producing many types of iron castings, thanks to its comparatively high tensile strength and elongation. And it is a favorite ductile iron material grade of American clients.

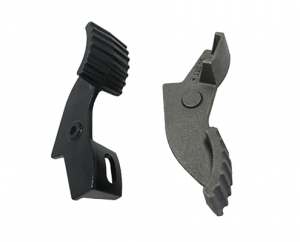
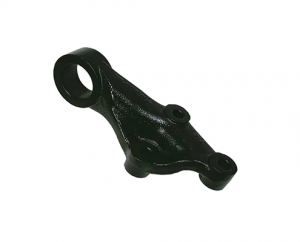
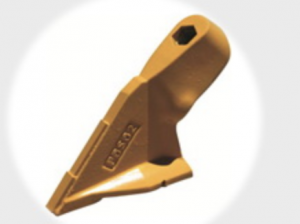
The main applications of this grade are manhole covers, tractor iron partscradle brackets of hydraulic cylinder, agricultural machinery partsplow points, and automotive parts. The followings are some ductile iron parts made by our Yide Casting (Jinma Foundry) in China.

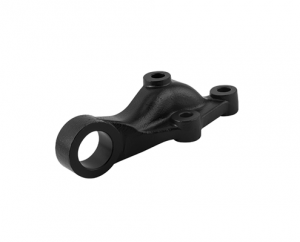
truck casting from Chinacast iron Brackets

Agricultural machinery car pedalcast iron auto parts

Yide casting is an experienced casting foundry, specialized in casting iron for 28years, can manufacture the casting iron parts according to your drawing file and requirement. If you are looking for a casting manufacturer, please feel free to contact us for more details, and you are welcome to visit our factory for more details.

ASTM A536 60-42-10 Ductile Cast Iron

ASTM A536 60-42-10 Ductile Cast Iron

ASTM A536 60-42-10 is a special grade of ductile iron according to the American standard.

This grade is equivalent to ISO 450-10, China QT450-10, Germany EN-GJS-450-10, UK 420/12, Italy GS400-12.

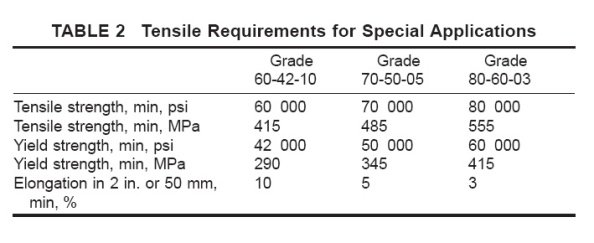
The yield strength of ductile cast iron 70-50-05 is no less than 290MPa, the tensile strength is no less than 415MPa, and the elongation (L0=50mm tensile test bar) is no less than 10%.

This grade of ductile iron is suitable for special applications, such as pipes, fittings etc. In practice, Grade 80-55-06 is better than this grade. Therefore, many clients will use 65-42-12 ductile cast iron instead.

This material grade has middle tensile strength, but the elongation is high. That means it is strong and ductile enough. Therefore, unless you have special reasons, otherwise, the equal grade 65-42-12 may be a better choice.

In standard ASTM A536, there is no requirement to the chemical composition. That means the iron foundry could adjust the chemical composition according to their experience. However, the mechanical properties are the necessary requirement.

You can find the mechanical requirement to ASTM A536 60-42-10 in the chart below:


ASTM A536 65-45-12 Ductile Cast Iron

ASTM A536 65-45-12 Ductile Cast Iron

ASTM A536 65-45-12 is a kind of ductile iron according to the American standard.

The yield strength is not less than 448MPa, the tensile strength is not less than 310MPa, and the elongation (L0=50mm tensile test bar) is not less than 12%. It is equivalent to China’s QT450-10.


  • Malleable cast iron

Malleable cast iron, referred to as tough iron. Obtained from white cast iron after annealing treatment, graphite is distributed in clusters. Its structural properties are uniform, wear-resistant, and have good plasticity and toughness. Used to manufacture parts with complex shapes and capable of withstanding strong dynamic loads.

  • Iron-carbon alloy

An iron-carbon alloy with a carbon content of more than 2%. Industrial cast iron generally contains 2% to 4% carbon. Carbon is mostly present in the form of graphite in cast iron, and sometimes in the form of cementite.

  • White cast iron

The content of carbon and silicon is low, and the carbon mainly exists in the form of cementite, and the fracture is silvery white. Large shrinkage during solidification, easy to produce shrinkage holes and cracks. It has high hardness and high brittleness and cannot bear impact load. It is mostly used as blanks of malleable cast iron and making wear-resistant parts.

YIDE casting is a professional casting foundry, specialized in cast iron since 1993s, provides both casting and machining service for the casting ductile iron casting parts, if you are interested in our casting service, please feel free to contact us for more details.

ASTM A536 70-50-05 Ductile Cast Iron

ASTM A536 70-50-05 is a high grade of ductile iron according to the American standard.

The yield strength of ductile cast iron 70-50-05 is no less than 345MPa, the tensile strength is no less than 485MPa, and the elongation (L0=50mm tensile test bar) is no less than 5%. It is equivalent to ISO grade 500-7, China QT500-7, Germany GGG50, EN-GJS-500-7, UK 500/7, Australia 500-7.

This grade of ductile iron is suitable for special applications, such as pipes, fittings etc. In practice, Grade 80-55-06 is better than this grade. Therefore, many clients will use 80-55-06 ductile cast iron instead.

Standard ASTM A536 has no requirement to the chemical composition. Hence the iron foundry could adjust the chemical composition according to their experience. However, the mechanical properties are the necessary requirement.

This material grade has high tensile strength, but the elongation is not high. That means it is strong, but does not have good ductility. Therefore, unless you have special reasons, otherwise, the equal grade 80-55-06 may be a better choice.

The following is the mechanical requirement to this grade.


Machining Surface Finish Chart (2)

Machining surface finish

Surface finish is another term for surface roughness. The surface finish is put forward according to the human visual point of view. Meanwhile, the surface roughness is put forward according to the actual surface micro-geometry. Because of its conformity with international standards (ISO), China adopted surface roughness after the 1980s and abolished surface finish. After the promulgation of the national standards for surface roughness GB3505-83 and GB1031-83, the surface finish is no longer used.

There are corresponding comparison tables for surface finish and surface roughness. Roughness has a calculation formula for measurement, while smoothness can only be compared with a model gauge. Therefore, the roughness is more scientific and rigorous than the finish.

Machining surface finish and surface roughness comparison table


surface finish value

surface roughness value

Ra

μm

1) Surface condition

2) Processing method

3) Application examples

1

400~800

2

200~400

1) Obviously visible tool marks

2) Rough turning, boring, planing, drilling

3) Surface after rough machining, 2 Welding seam before welding, rough drilling wall, etc.

3

100~200

1) Visible tool marks

2) Rough turning, planing, milling, drilling

3) General non-bonding surfaces, such as shaft end faces, chamfers, side surfaces of gears and pulleys, non-working surfaces of keyways, and weight-reducing hole surfaces

4

50~100

1) Visible machining traces

2) Turning, boring, planing, drilling, milling, filing, grinding, rough reaming, milling teeth

3) Matching surfaces of unimportant parts, such as pillars, brackets, shells, bushes, shafts, covers, etc. End face. The free surface of the fastener, the surface of the through hole of the fastener, the non-centering surface of the inner and outer splines, the round surface of the gear top ring that is not used as a measurement reference, etc.

5

25~50

1) Processing traces are slightly visible

2) Turning, boring, planing, milling, scraping 12 points/cm^2, drawing, grinding, filing, rolling, milling

3) Connecting with other parts does not form a matching surface, such as The end face of the box, shell, end cover and other parts. Fixed bearing surfaces that require centering and matching characteristics, such as centering shafts, working surfaces of keys and keyways. The surface of the fastening thread is not important. Surfaces that need knurling or oxidation treatment

6

12.5~25

1) Can’t see the processing traces

2) Turning, boring, planing, milling, reaming, drawing, grinding, rolling, scraping 12 points/cm^2 milling teeth

3) Mounting the housing hole of G-class bearing with a diameter of more than 80mm , Ordinary precision gear tooth surface, positioning pin hole, surface of V-belt pulley, outer diameter of inner spline centered by outer diameter, centering shoulder surface of bearing cap

7

6.3~12.5

1) The direction of the machining traces can be distinguished

2) Turning, boring, drawing, grinding, milling, scraping 3-10 points/cm^2, rolling

3) Surfaces that require centering and matching characteristics, such as taper pins and cylinders The surface of the pin, the shaft diameter and housing hole matched with the G-class precision rolling bearing, the shaft diameter for medium-speed rotation, the shaft diameter and the housing hole of the E and D rolling bearing with a diameter of more than 80mm, and the centering of the inner and outer splines Inner diameter, outer spline key side and centering outer diameter, interference fit IT7 hole (H7), clearance fit IT8IT9 hole (H8, H9), ground gear surface, etc.

8

3.2~6.3

1) Micro-identification of the direction of the machining traces

2) Reaming, grinding, boring, pulling, scraping 3-10 points/cm^2, rolling

3) The mating surface that requires long-term maintenance of stable mating properties, IT7-level shaft and hole mating surface , High precision gear surface, important parts subject to variable stress, shaft diameter surface matched with E and D class bearings with a diameter of less than 80mm, shaft surface contacting with rubber seals, IT13IT16 with a size greater than 120mm Measuring surface of hole and shaft gauge

9

1.6~3.2

1) The direction of the machining traces cannot be discerned

2) Wheel grinding, grinding, grinding, super processing

3) The surface of important parts subject to variable stress during work. Ensure the fatigue strength, corrosion resistance and durability of the parts, and do not damage the mating surface during work, such as the shaft diameter surface, the airtight surface and the supporting surface, and the conical centering surface. IT5, IT6 level mating surface, surface of high-precision gear, shaft diameter surface matched with G-level rolling bearing, IT7IT9 level hole with size greater than 315mm and shaft gauge level IT10IT12 hole with size greater than 120315mm Measuring surface of shaft gauge, etc.

10

0.8~1.6

1) Dark glossy surface

2) Super processing

3) The surface of important parts that are subjected to large variable stress during work. Ensure precise centering of the cone surface. Hole surface for hydraulic transmission. The inner surface of the cylinder liner, the outer surface of the piston pin, the instrument guide surface, and the valve working surface. IT10IT12 grade hole and shaft gauge measuring surface with size less than 120mm

11

0.4~0.8

12

0.2~0.4

13

0.1~0.2

14

<0.1

Inspection Rules of Gray Cast Iron

Inspection Rules of Gray Cast Iron

  •  Inspection rights

  1. The supplier quality department has the right to inspect and accept or not the castings.
  2. The buyer may request re-inspection of castings when necessary.
  3. The supplier is responsible for the authenticity of the inspection results; and submits the production record documents when required by the buyer.


  • Inspection location


  1. Except for the agreement between the supplier and the buyer, the supplier carries out final inspection generally.
  2. When the supplier and buyer dispute the quality of castings, the inspection may be carried out by a third party. And the third party should has laboratory qualification.


  • Division of sampling batches

The supplier must test the castings for chemical composition, mechanical properties, and metallography in batches. The batch is divided as follows:

  1. Castings cast by the same molten iron from the same furnace constitute a sampling batch.
  2. Castings casted from the same ladle of molten iron constitute a sampling batch.
  3. The maximum weight of each sampling batch is 2000 kg of castings after cleaning. The sampling batch may changes upon agreement between the supplier and the buyer.
  4. If the weight of a casting is larger than 2000 kg, it will become a single sampling batch.
  5. Within a certain time interval, if the furnace charge, process conditions, or chemical composition changes, all castings cast by molten iron during this period, no matter how short the time interval, are regarded as a sampling batch.
  6. When continuously melting a large amount of molten iron, the maximum weight of each sampling batch shall not exceed the weight of castings poured within 2h.

In addition to the provisions of 10.3.2, if a grade of molten iron has a large amount of melting, and adopts a system-controlled melting technology and strict monitoring of the production process, and can carry out a certain form of process control on a bale (furnace) basis, such as chilling tests, chemical analysis, thermal analysis, etc., upon agreement between the supplier and the buyer, several batches of castings may also constitute a sampling batch.


  • Test times

At least once of each sample test.


  • Evaluation of test results

  1. When testing the tensile strength, first use a tensile specimen to test, if it meets the requirements, the batch of castings is qualified in the material; If not, you can take another two samples from the same batch for re-testing.
  2. In case the results of the re-inspection all meet the requirements,  the material of this batch of castings is still qualified. If one of the re-inspection results still fails, this batch of castings were preliminarily judged to be unqualified. At this time, one casting should be taken out of the batch. And the cast body sample should be cut out at the site agreed by the supplier and the buyer for tensile strength testing. If the test result meets the requirements, it can still be judged that the batch of casting materials are qualified; if the body sample test result fails to meet the requirements, it can be finally determined that the batch of casting materials is unqualified.


  • Effectiveness of the test

When the test result does not meet the requirements due to one of the following reasons, the test is invalid.

  1. Improper installation of the sample on the testing machine or improper operation of the testing machine.
  2. The surface of the sample has casting defects or improper cutting (such as sample size, transition fillet, roughness does not meet the requirements, etc.)
  3. The sample breaks outside the parallel section.
  4. There are casting defects on the fracture after cutting the sample

At this time, the supplier should repeat the test according to 10.5.1 and 10.5.2, and replace the data of the defective sample with the obtained results.


  •  Saving test data

The supplier shall check in accordance with this standard, and be responsible for the accuracy and authenticity of all test results completed. The supplier shall use its own or other reliable equipment to save all complete test and inspection records, for further review.

  • Sample storage

If the buyer has no special requirements, the supplier should store the same batch of tensile specimens and untested specimens  for more than three months from the date of filling in the test report.

Ductile Cast Iron 80-60-03

Ductile cast iron 80-60-03 is a high grade material in US standard ASTM A536. This grade has comparatively high tensile strength, but low elongation.

Now, let me introduce its mechanical properties, chemical composition, foundries and castings to you.

Properties of Ductile cast iron 80-60-03

Tensile Strength ≥ 555 MPa (80,000 psi).
Yield Strength ≥ 415 MPa (60,000 psi).
Elongation ≥ 3%

Hardness of Ductile cast iron 80-60-03

The hardness of this ductile cast iron grade is between 180-270 Brinell hardness without heat treatment.

Chemistry composition of Ductile cast iron 80-60-03

According to the US standard ASTM A536, the foundries could adjust the chemical composition as long as the mechanical and physical properties of the castings could meet the requirements in Standards.

The following chart is an approximate chemical composition range for your reference.

ASTM A536 ISO C % Si % Mn % P % S %

80-60-03

600-3 2.50-3.60 1.80-2.80 0.30-0.70 ≤0.08 ≤0.02

Equivalent grades of Ductile cast iron 80-60-03

Country

Standard

Equivalent Grade

ISO

ISO 1083

GRADE 600-3

China

GB 1348

QT600-3

USA

ASTM A536

80-60-03

Germany, Austria

DIN 1693

GGG60

European

EN 1563

EN-GJS-600-3

Japan

JIS G5502

FCD600

Italy

UNI 4544

GS600-2

France

NF A32-201

FGS600-2

UK

BS 2789

600/7

Spain

UNF

FGE60-2

Belgium

NBN 830-02

FNG60-2

Australia

AS 1831

GRADE 600-3

Sweden

SS 14 07

0732-03

Norway

NS11 301

SJK-600

Foundry of Ductile cast iron 80-60-03

Ductile cast iron 80-60-03 has very high tensile strength, good wearing resistance and vibration damping characteristic. Therefore,  this material could be used to produce very tough casting products, such as connection, connecting rod, bracket, gear, clutch disc, hydraulic cylinder etc.

These ductile iron castings were produces by Yide Casting in China.

Cast iron connecting bracketiron casting product

Ductile Cast Iron EN-GJS-400-15/GGG40

Ductile Cast Iron EN-GJS-400-15/GGG40


EN-GJS-400-15 ductile iron is a very common material in European standard DIN EN 1563.

It is equal to GGG40 in DIN 1693, QT400-15 in China, A536 60-40-18 in USA ASTM, GS400-12 in Italy, FCD400 in Japan, FGS400-12 in France, FNG42-12 in Belgium, SJK-400 in Norway and ISO 1083 400-15.

Now, let me introduce its mechanical properties, chemical composition, foundries and castings to you.

Properties of EN-GJS-400-15/GGG40 cast iron

Tensile strength ≥ 400 Mpa.
Yield strength ≥ 250 Mpa.
Elongation ≥ 15%.
No impact requirement.

Hardness of EN-GJS-400-15/GGG40 cast iron

The hardness of this ductile cast iron grade is between 130-180 Brinell hardness.

Density of EN-GJS-400-15/GGG40 cast iron

The density of this ductile iron grade is about 7.3 g/cubic centimeter, or 7.3 kg/liter.

Chemistry composition of EN-GJS-400-15/GGG40 cast iron

According to the standard DIN EN 1563 and DIN 1693, the foundries could adjust the chemical composition as long as the mechanical and physical properties of the castings could meet the requirements in Standards.

The following chart is an approximate chemical composition range for your reference.

DIN EN 1563 ISO C % Si % Mn % P % S %
EN-GJS-400-15 400-15 2.5-3.8 0.5-2.5 0.2-0.5 ≤0.08 ≤0.02

Foundry of EN-GJS-400-15/GGG40 cast iron

These ductile iron castings were produced by Yide Casting in China.

machinery part

Cast Iron Wheel Hub Shell

Engine Base Ductile Iron

Engine Base Ductile Iron

Auto Part Cast Iron Bracket

Auto Part Cast Iron Bracket

car part

Ductile Iron Auto Parts

cast iron car flange

Ductile Iron Casting Auto Flange

Truck casting

Cast Iron Fire Truck Parts Casting

Properties of 60-40-18 ductile iron/400-12 cast iron

60-40-18 ductile iron is equal to 400-12, but with higher elongation. 60-40-18 is US standard ASTM A536, while 400-12 is Australia standard AS 1831. In the meantime, the equal grade in China is QT400-18 or QT400-15.

Properties of 60-40-18 ductile iron/400-12 cast iron

60-40-18 ductile iron is the lowest grade of ductile iron. Its minimum tensile strength is 414 Mpa (60.000 psi); the minimum yield strength is 276 Mpa (40.000 psi); the minimum elongation is 18%. For 400-12 in the Australian standard AS 1831, the minimum value of elongation is 12%.

Elongation means that the test bar could be pulled and lengthened at least by 18%. In this regard, this material grade has the best elongation properties. This means it has the best ductility. Moreover, it has the best long-term temperature shock performance. Due to its good performance, this material grade has been widely used.

Hardness of 60-40-18 ductile iron/400-12 cast iron

The hardness of this ductile cast iron grade is between 49-187 Brinell hardness. However, we usually will not take hardness into inspection standard, unless the clients have special requirements.

Higher hardness may cause the difficulty and low speed of machining, while lower hardness means that it couldn’t reach the grade. Thus, normally, foundries should produce this grade of ductile iron castings within this range.

Chemistry composition of 60-40-18 ductile iron/400-12 cast iron

According to the standard ASTM A536 and AS 1831, the foundries could adjust the chemical composition as long as the mechanical and physical properties of the castings could meet the requirements in Standards.

The following chart is an approximate chemical composition range for your reference.

ASTM ISO C % Si % Mn % P % S % Mg %
60-40-18 400-18 3.50-3.78 2.80-2.85 0.2-0.5 0.03-0.06 0.02-0.035 0.020-0.060

Density of 60-40-18 ductile iron/400-12 cast iron

The density of this ductile iron grade is about 7.3 g/cm3.

Foundry of 60-40-18 ductile iron castings

These ductile iron castings were produces by Yide Casting in China.

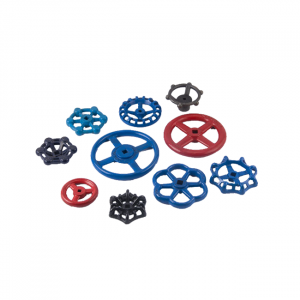
Ductile Iron Handwheel

iron casting part casting iron partsH59 Brass hand pallet oil pump